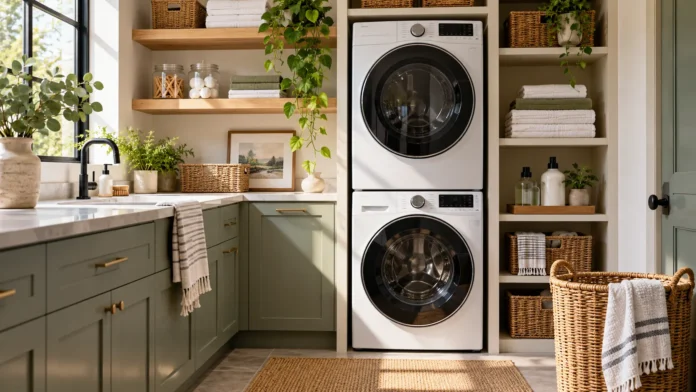
A peel and stick backsplash is one of the easiest ways to refresh your kitchen or bathroom without spending money on a major renovation. These decorative wall coverings offer the appearance of traditional tile, stone, marble, or other attractive finishes without requiring conventional tile installation. With a variety of colors, patterns, and textures available, homeowners can create a stylish backsplash that complements modern, traditional, or farmhouse interiors.
Learning how to install a peel and stick backsplash is relatively straightforward, especially when the wall surface is properly prepared. However, choosing the right material, measuring accurately, and understanding installation limitations are essential for achieving a lasting result. This guide explores beautiful backsplash ideas, popular materials, installation steps, common mistakes, maintenance tips, and practical ways to improve your kitchen or bathroom design.
What Is a Peel and Stick Backsplash?
A peel and stick backsplash is a decorative wall covering with an adhesive backing that allows it to attach directly to a compatible surface. Unlike traditional ceramic tile installations, many adhesive backsplash products do not require separate mortar or grout. They are available as flexible sheets, individual tiles, or panels designed to create different decorative appearances.
Most products feature a removable backing that protects the adhesive until installation. Once positioned correctly, the backsplash sticks to the prepared wall and forms a decorative surface. Some products include raised textures or printed patterns that imitate ceramic tiles, natural stone, subway tiles, and other popular kitchen finishes.
Peel and stick backsplashes are commonly used behind kitchen countertops, near bathroom vanities, and in other suitable decorative areas. Their convenience makes them appealing for smaller home improvement projects. However, performance depends on the product’s materials, adhesive quality, wall condition, and exposure to heat or moisture.
Benefits of Installing a Peel and Stick Backsplash
One of the biggest advantages of peel and stick backsplash tiles is their relatively simple installation process. Many products can be installed without specialized tile-setting equipment, making them attractive for beginner DIY projects. Homeowners can often refresh an existing wall without removing large sections of drywall or completing extensive construction work.
Another benefit is the variety of decorative styles available at different price points. Adhesive backsplash products can imitate expensive materials, allowing homeowners to experiment with marble-inspired patterns, metallic accents, or colorful tile arrangements. This flexibility makes it easier to coordinate a backsplash with existing cabinets, countertops, and kitchen accessories.
Peel and stick materials may also be convenient for smaller spaces where traditional tile installation would require additional preparation and labor. However, they are not automatically suitable for every wall or environment. Understanding manufacturer requirements and realistic durability expectations helps homeowners determine whether this type of backsplash is appropriate for their project.
Best Peel and Stick Backsplash Ideas for Modern Kitchens
Modern kitchens often feature clean lines, simple colors, and carefully coordinated materials. A white subway tile peel and stick backsplash can create a bright, timeless appearance that works with many cabinet finishes. Its rectangular pattern provides visual structure without overwhelming the room, making it suitable for both small and spacious kitchens.
Marble-look adhesive tiles are another attractive option for contemporary interiors. Their soft gray veining and light background can complement white cabinets, natural wood accents, and darker countertops. Choosing a subtle pattern helps maintain an elegant appearance while allowing other decorative features, such as lighting and cabinet hardware, to stand out.
For a bolder modern design, consider charcoal, navy, or geometric peel and stick backsplash patterns. These styles can introduce contrast and personality into otherwise neutral rooms. Maintaining a consistent color scheme across countertops, cabinets, and surrounding accessories helps the backsplash feel like an intentional part of the overall kitchen design.
Stylish Peel and Stick Backsplash Ideas for Farmhouse Kitchens
Farmhouse kitchens are known for their welcoming atmosphere, natural textures, and combination of traditional and practical design features. A cream or warm white peel and stick backsplash can complement shaker cabinets, wooden shelving, and rustic accessories. Light-colored tile patterns also help create a soft background for more decorative kitchen elements.
Brick-look peel and stick backsplash panels are another popular choice for farmhouse-inspired interiors. Their textured appearance can introduce warmth and character without requiring traditional masonry installation. Depending on the color and finish, brick patterns may work well alongside butcher block countertops, black cabinet handles, and vintage-style lighting.
Homeowners seeking a more decorative farmhouse appearance can consider patterned tiles inspired by traditional European or Mediterranean designs. Muted blues, soft greens, and warm neutral colors can add personality while preserving a relaxed atmosphere. Choosing patterns that complement existing finishes prevents the space from feeling overly busy or visually disconnected.
Popular Peel and Stick Backsplash Materials and Finishes
Peel and stick backsplash products are available in several materials, including vinyl, composite panels, metal, and genuine stone or tile with adhesive backing. Each material offers different advantages concerning appearance, weight, durability, and maintenance. Understanding these differences can help homeowners select products that match both their design preferences and installation requirements.
Vinyl-based backsplash sheets are often lightweight and relatively easy to cut, making them convenient for decorative projects. Composite products may feature raised surfaces designed to imitate traditional tile. Metal panels and natural stone products can provide different visual textures, although some require stronger substrates, additional preparation, or specialized installation instructions.
Material selection should also consider heat exposure, moisture resistance, cleaning requirements, and compatibility with the existing wall. Some decorative products are unsuitable near cooking appliances or locations exposed to frequent splashing. Always review the manufacturer’s specifications rather than assuming that every peel and stick backsplash offers the same level of protection.
How to Choose the Right Peel and Stick Backsplash
Choosing the right backsplash begins with evaluating the room’s colors, lighting, and existing design elements. A backsplash should coordinate with cabinets, countertops, flooring, and surrounding fixtures rather than competing with them. Light patterns can help brighten smaller kitchens, while darker or more detailed designs may create a stronger decorative focal point.
The condition and material of the wall are equally important considerations. Many adhesive products work best on clean, smooth, dry, and properly cured painted surfaces. Textured walls, loose paint, wallpaper, and porous materials may prevent reliable adhesion unless the manufacturer specifically approves those surfaces or recommends additional preparation.
Before purchasing, compare product dimensions, coverage, thickness, and installation requirements. Requesting samples can help you evaluate colors and textures under your home’s actual lighting conditions. Checking removal instructions and adhesive compatibility is particularly important when decorating rental properties or surfaces that may need future restoration.
Tools and Materials Needed for Installation
Installing a peel and stick backsplash generally requires fewer tools than traditional tile installation. Common supplies include a measuring tape, pencil, level, straightedge, utility knife, and clean microfiber cloth. Some products may also require scissors, a cutting mat, or a manufacturer-recommended roller for smoothing the material against the wall.
A measuring tape and level help establish accurate placement and maintain consistent alignment across the installation area. A suitable cutting tool allows you to trim sheets around edges and other obstacles. Keeping the workspace organized can reduce measurement mistakes and prevent adhesive surfaces from collecting dust before they are attached.
Always read the product instructions before gathering supplies because material thickness and construction can affect the required tools. Some rigid panels need different cutting equipment than flexible vinyl sheets. Use suitable eye protection during cutting, and arrange professional electrical assistance if outlet covers or electrical components require work beyond safely removing decorative faceplates.
How to Prepare the Wall Before Installation
Proper wall preparation is one of the most important steps for achieving good adhesion and an attractive finished backsplash. Begin by inspecting the surface for damaged paint, moisture, grease, or loose material. These conditions can prevent the adhesive from bonding evenly and may cause sections to lift or separate later.
Clean the wall using a product approved for the existing finish, paying particular attention to areas behind kitchen counters where grease can accumulate. Remove cleaning residue and allow the surface to dry completely. If the wall has recently been painted, follow the paint and backsplash manufacturers’ curing recommendations before attaching adhesive panels.
Next, measure the installation area and identify where the backsplash will begin and end. Mark a straight reference line using a level to help maintain alignment. Planning the layout before removing adhesive backing can reduce awkward cuts, mismatched patterns, and narrow pieces near visible edges.
How to Install a Peel and Stick Backsplash Step by Step
Begin installation at the planned starting point, following the orientation shown in the manufacturer’s instructions. If the product uses overlapping edges or interlocking patterns, account for those details before positioning the first sheet. Accurate placement of the initial piece establishes the alignment for the rest of the backsplash.
Peel away a small section of the protective backing and carefully position the adhesive surface against the prepared wall. Once the top or starting edge is aligned, gradually remove more backing while pressing the material into place. Work slowly to minimize trapped air and avoid stretching flexible sheets during application.
Continue installing adjacent pieces according to the product’s overlap or seam requirements. Use a straightedge and suitable cutting tool for careful trimming around corners and edges. After installation, press the panels as recommended and allow any specified adhesive bonding period before exposing the area to routine kitchen or bathroom conditions.
How to Handle Corners, Outlets, and Uneven Spaces
Corners, electrical outlets, and irregular wall sections require careful planning because they interrupt otherwise continuous backsplash patterns. Measuring each opening accurately helps produce a cleaner appearance and reduces wasted material. A paper template can be useful when transferring complicated shapes onto the back of adhesive panels before cutting.
For inside corners, follow the manufacturer’s instructions about whether panels should overlap or meet at a joint. Avoid forcing rigid materials around bends that exceed their intended flexibility. Where the backsplash ends against another surface, approved finishing trim may help create a neat transition while protecting exposed edges.
Electrical outlets deserve particular care because backsplash thickness can affect how faceplates sit against the wall. Switch off the relevant circuit before removing faceplates, and never alter electrical wiring or leave unsafe gaps around devices. A qualified electrician should handle any required box extensions or changes to electrical components.
Common Peel and Stick Backsplash Installation Mistakes
One common mistake is applying adhesive backsplash sheets over dirty, greasy, or damp walls. Even a high-quality product may struggle to bond when the surface contains residue or loose paint. Taking time to clean and prepare the installation area is generally more effective than trying to correct peeling panels afterward.
Another frequent problem involves incorrect measurements or poor alignment of the first panel. Small errors can become increasingly noticeable as additional sheets are installed across the wall. Dry-fitting the layout, marking reference lines, and checking pattern placement before removing backing can help prevent uneven seams and wasted materials.
Homeowners may also overlook heat restrictions or moisture limitations when choosing where to install their backsplash. Products designed for ordinary decorative walls may not tolerate conditions directly behind certain cooking appliances. Ignoring manufacturer guidance, covering unsuitable surfaces, or rushing installation can reduce durability and create unnecessary safety concerns.
How to Clean and Maintain a Peel and Stick Backsplash
Regular cleaning helps preserve the appearance of peel and stick backsplash tiles and prevents grease or food residue from accumulating. For many compatible products, a soft cloth and mild cleaning solution are sufficient for routine maintenance. However, different materials require different care, so always follow the manufacturer’s cleaning recommendations.
Avoid abrasive scrubbers, harsh chemicals, and excessive moisture unless the product is specifically designed to tolerate them. Strong cleaning agents may damage printed finishes, discolor certain materials, or affect exposed adhesive edges. Wiping splashes promptly can make maintenance easier and reduce the need for aggressive cleaning methods.
Inspect the backsplash occasionally for lifting corners, separated seams, or signs of moisture reaching the underlying wall. If panels begin peeling, investigate the cause rather than repeatedly pressing them back into place. Replacing damaged sections or addressing surface problems early can help maintain the overall appearance of the installation.
Conclusion
A peel and stick backsplash offers a convenient way to refresh kitchens, bathrooms, and other suitable decorative spaces. With designs ranging from classic subway tiles to marble-inspired finishes and colorful geometric patterns, homeowners can create attractive interiors without conventional tile installation. Choosing a design that complements existing materials helps achieve a coordinated appearance.
Successful installation depends on selecting a compatible product, preparing the wall properly, measuring carefully, and following the manufacturer’s application instructions. Special attention should be given to corners, electrical outlets, moisture exposure, and areas near cooking appliances. These details help prevent common installation problems and support better long-term performance.
Whether you are updating a small kitchen or adding character to a bathroom vanity, peel and stick backsplash products can provide an appealing decorative solution. Consider durability, maintenance needs, and removal requirements before purchasing. With thoughtful planning and regular care, an adhesive backsplash can make your space feel refreshed, stylish, and more personal.
FAQs
Is peel and stick backsplash a good idea for kitchens?
Yes, peel and stick backsplash products can work well in kitchens when installed on suitable surfaces. Choose materials specifically approved for kitchen conditions and follow manufacturer requirements for heat, moisture, and cleaning.
How long does a peel and stick backsplash last?
Its lifespan depends on product quality, surface preparation, temperature, moisture exposure, and maintenance. Properly installed products may last several years, but durability varies considerably between materials and manufacturers.
Can you install peel and stick backsplash over existing tiles?
Some products can be installed over smooth, clean, firmly attached tiles, but compatibility varies. Deep grout lines or uneven surfaces may require preparation before installation, so check the manufacturer’s recommendations.
Is peel and stick backsplash easy to remove?
Removal difficulty depends on adhesive strength, installation age, and the underlying wall finish. Some products remove relatively easily, while others may damage paint or leave adhesive residue during removal.
Can peel and stick backsplash be used in bathrooms?
Yes, certain peel and stick backsplash materials are suitable for bathroom vanity areas. However, products should be specifically approved for moisture exposure and should not replace proper waterproofing in showers.